
USING COLORED GELS TO CREATE EMOTION
We are four photographers who came together to share with you how we used colored gels to create emotion in our images. Although we may all have a different approach, our mission is the same. Emotion, Emotion, Emotion!
Let's get started with David Morel
DAVID MOREL

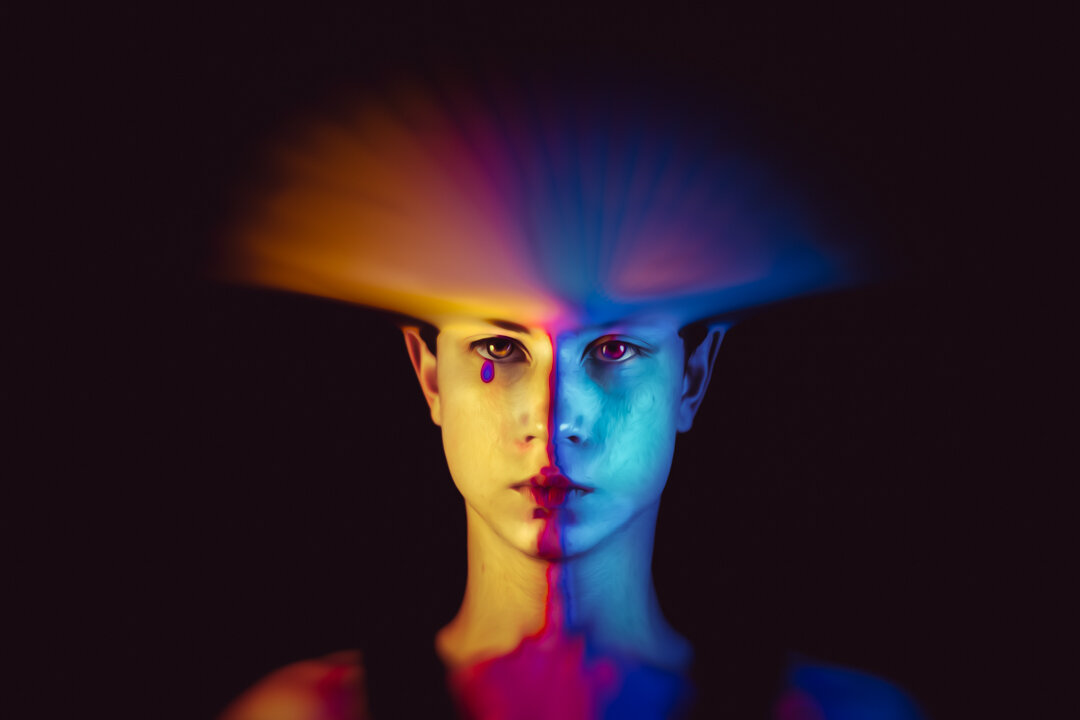
I use colored gels in a good bit of my photo shoots when working with models. They add another level of energy and excitement to shoots and are a favorite of the models I assist with their portfolios. With this blog post I will take you through a recent shoot I did with my friend and singer/actor/model, Ashley Watkins.
For this shoot, I used a couple Godox AD200 strobes in 12x55 strip boxes from CheetahStand. Each strobe had a Rogue color gel, one red and one blue, and positioned to the sides of Ashley.


Once the strobes are positioned, I adjust the power settings of one strobe and then the other. I do this by only having one on and adjust that strobes power level until I have it like I want it. Then, I turn it off and turn the other one on repeating the process.


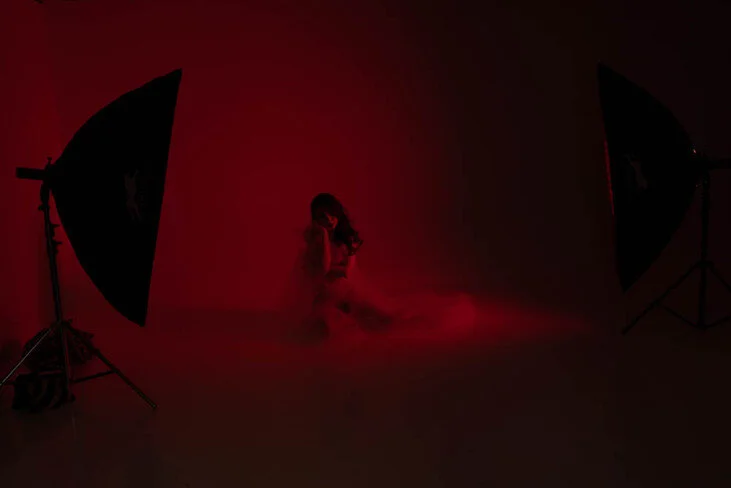

Once I have each light as I want it, I can turn them both on and begin photographing. Notice that you have both red and blue edging on the model and a mixture of colors on the background. It goes from red to purple to blue.

After the shoot, I import the raw images into Lightroom where I cull the images to focus on my favorites from the shoot. I then do some adjustments to exposure, white balance, reduce contrast via a tone curve adjustment, and play with the colors via the Hue/Saturation/Luminance panel. The "after" version will seem flat and boring, but it makes sure I have the image data needed to finalize the edit in Photoshop.

I export the images and open up in Photoshop to continue the editing. I will start with retouching the background and the model's skin to reduce distractions. Next I have an action that creates a smoothing layer that I paint on to the skin and mask away from the other areas. I add a dodge and burn layer where I enhance the contours of the model's skin. At this point I include a couple layers grouped together to provide some sharpening, both broadly and finely. I add a layer using the screen blending mode to increase the brightness and use Blend/If to enhance the highlight areas of the image. The next step is to add 3 curve layers, one for each color(Red/Green/Blue), that I use to manipulate/enhance the colors to how I want the image to look. My last regular step is to add a bit more of contrast and clean up any distractions I had missed earlier.
Now the image is finished, I resize for the web and apply a little bit of sharpening to get the final results of the first image at the top of this article and the images below.


Now let's hear from Natalie Finney on how she uses color to convey emotions...
NATALIE FINNEY


This series of images was created as a personal project and I titled it ‘Grief – The Abridged Version’. The idea behind this series was to explore the commonly misunderstood concept of the ‘five stages of grief’, popularised in the 1980’s as a linear roadmap on how to navigate through loss of a loved one. This series is a bit tongue in cheek; it looks to challenge the notion that grief progresses through a series of delineated stages and depicts the theory as an oversimplification of what is very much a uniquely individual process.
The five stages of grief were first proposed by Elisabeth Kübler-Ross in her 1969 book ‘On Death and Dying’. The stages are as follows; Denial, Anger, Bargaining, Depression, and Acceptance.
They were initially intended to help explain a series of emotions that a terminally ill person may experience upon the learning of their fate and the lead up to their death. As mentioned above, the theory was popularised and to a degree mistaken to also apply to people who are grieving the loss of another person. Moreover, vague literature and widespread articles on the internet often suggest that these emotions are experienced in a progressive manner beginning always with denial and eventually leading to acceptance. I found this fascinating as during this time, I was in the early stages of my own grieving process having recently lost my own mother.
When I set out to create this series of 5 portraits I wanted to convey the emotions described by Kübler-Ross not only in expression and pose of my children, but I also wanted to add a further layer of understanding and statement through the use of colour. I turned to colour theory and wheels such as below and paired the following colours with the emotion I was trying to convey; a warm golden yellow with Denial (ignorance/cautious), red with Anger (rage/hatred), purple with Bargaining (grace/spirituality), blue with Depression (sadness), and green with Acceptance (learning/peace).

Colour options were easy when it came to backdrop and clothing choice, but I felt it wasn’t quite enough to push the emotion through. This is why I decided to incorporate the use coloured gels on my lights to bring the overall colour message home. The gels I use are an inexpensive set I purchased of Amazon and are 30x30cm. There are 8 colours and they are quite thick meaning I haven’t yet damaged them after continued use!
I use these gels over the small head of a speedlight, so I only need to cut a small section from the larger piece. You can get fancy rubber bands to attach these sorts of gels but I find some sturdy gaffer tape at the sides does the trick just fine.


My lighting setup was a 2 light system. A key strobe light used at varying angles to light each of the scenes (inside a strip box diffuser) plus a secondary speedlight that had a single coloured gel on it directed into a white foamcore board to reflect a beautiful wash of coloured light back onto the scene and my subject. Because I bounced the light, the wash of colour is really subtle and it just gives an overall unifying effect without overwhelming the scene and distorting skin tone too much.
Here's April Milani approach to using colored gels...
APRIL MILANI
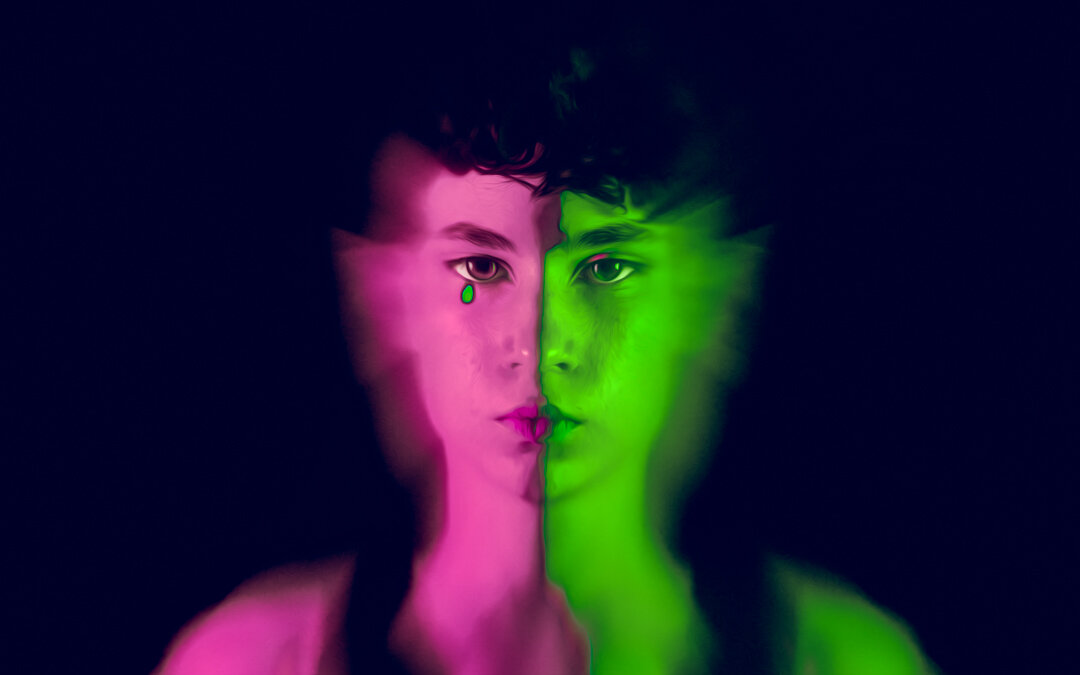
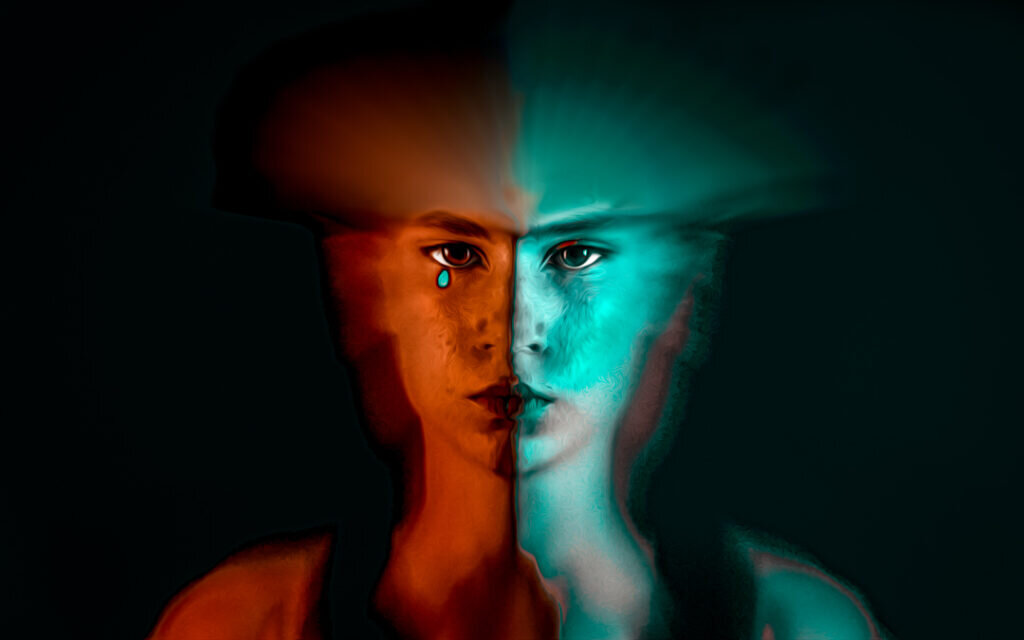
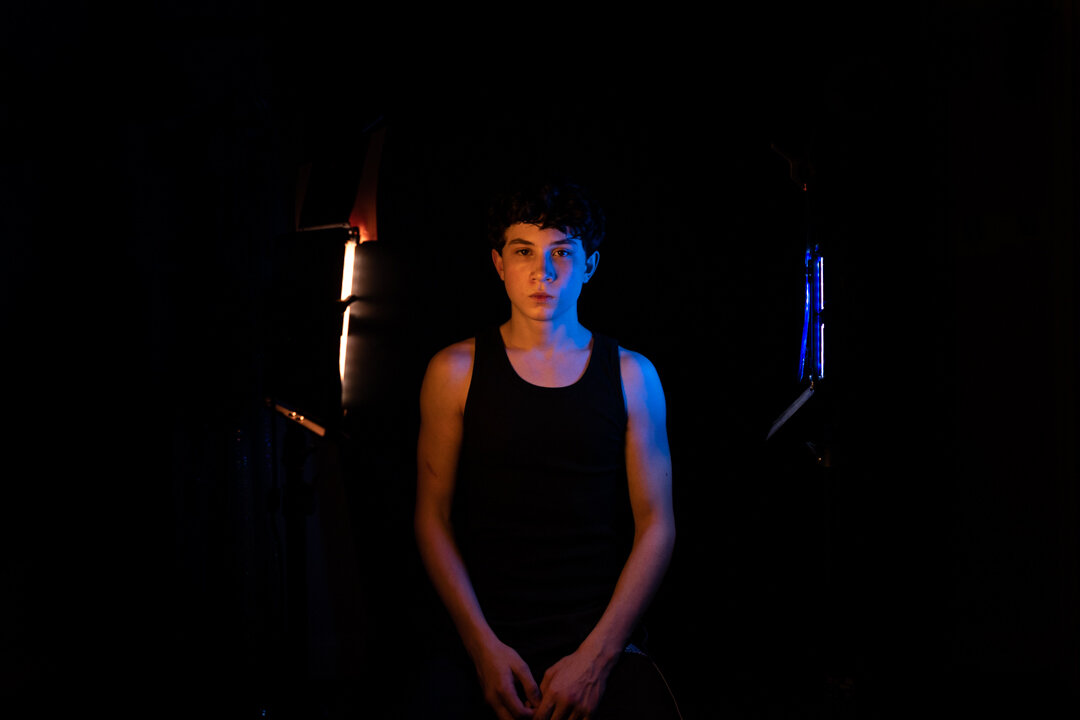
Above you will see three different images, or are they. Actually, it is one image processed three unique ways to convey a different emotion in each image. Let's break this down, starting with the SOOC, straight out of camera image below. Here are my settings: ISO 400, 70mm, F/ 2.8/ SS 500 sec. I used a black sheet for my back ground. Doing this will allow your colors to stand out. Make sure all other lights in the room are turned off.
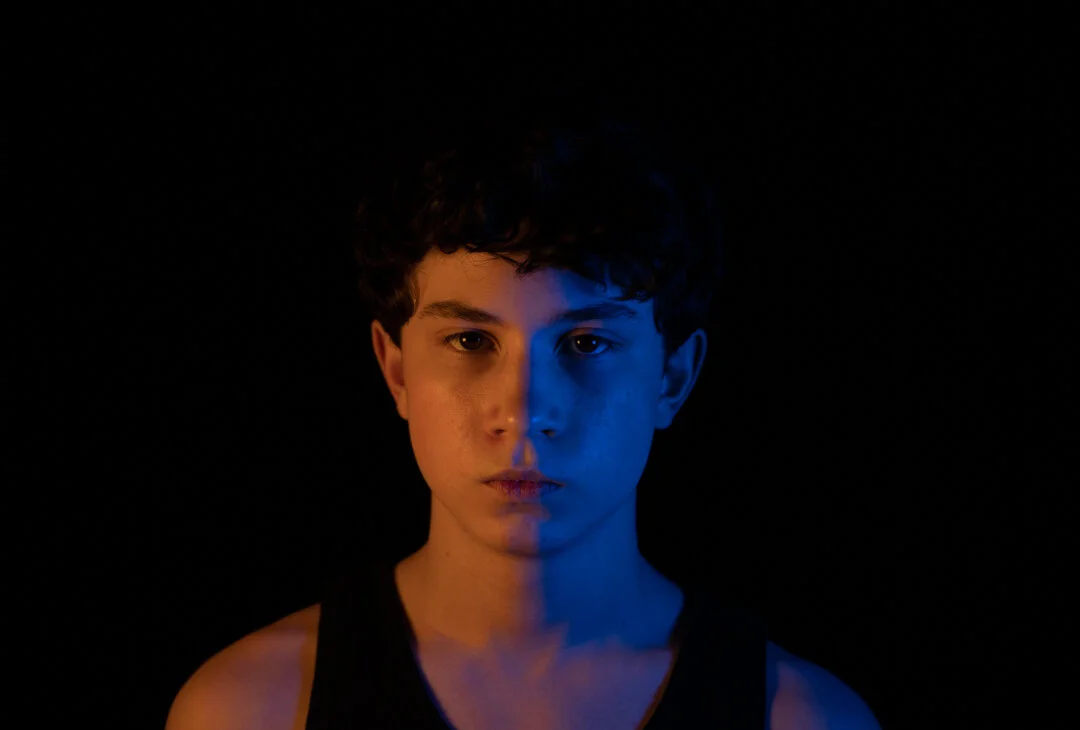
Here is my simple two light set up. I used my Neewer LED Barn door lights . On one light I used a blue gel and the other a golden yellow.
Now that I have my image and you know how I created it. Let's move on to editing...

Knowing the rules of your software program is essential in knowing how to break and bend the rules. I used the clone tool in reverse. Instead of removing the blue light under his nose, made into a tear. Pretty fun!

I'm doing this demonstration in Lightroom. But this can be achieved with any software that has the HSL panel. Are there other ways to do this? Yes. But that will be for another time. The fancy flare was created in Exposure. I love to take my editing over the top. You options are endless.


In closing Id like to share four more images. Look at the way the light hits the face and body. This will also help invoke emotion. From flat light (first two images) then having your subject side lit to create shadows and definition. Then if you scroll back to my first image you will see I used split light. When you use color and light to tell your subject's story, you'll find a whole new world opens. I dare you to go out and break a rule or two. ;-)
So now you are totally inspired, But you don't have gels??? No worries!!! Laurence Boswell has got your back...
LAURENCE BOSWELL
Thanks to Photoshop, you can add color in post-editing! First, I'll show you some behind the scenes photos, and then I've provided a video to watch going over my process in Photoshop.
I created my image using a simple setup. I had one main light source, a basic background, and my camera. I made sure the subject (me) was lit properly and I got the emotion I was trying to convey in the image.

Once that was done, I imported the image into Photoshop and used a few layers and started experimenting with color. Generally speaking, when adding intense color to an image, you want to make sure that your highlights are one color and your shadows are a different color. This is done by using the brush tool.
As you can see, for this image I painted yellow light into the highlights and blues/purples into the shadows. This exasperates the emotion in the image and creates a very intense scene


To see the step by step guide on how to add color in post-production, watch the video below!